

Inspired by the rich flavors of a Peet’s Coffee favorite, this Dark Chocolate Orange Mocha Cake is a sophisticated balance of bold, zesty, and sweet notes. While chocolate and orange are often associated with winter holidays, the refreshing citrus brightness makes this cake a delight year-round—even on a summer day.
This recipe goes beyond simply adding orange extract; it layers natural flavor into every element. The milk for the sponge is steeped with fresh orange zest, creating a subtle citrus undertone that pairs perfectly with the dark chocolate and strong coffee. The filling is a light, airy whipped cream that cuts through the richness, mimicking the foam on a latte, while the silky Chocolate Orange Ganache Buttercream ties everything together.
The cake texture itself is moist and fluffy, owing to a “hot coffee melt” technique where dark chocolate is dissolved into fresh coffee before being added to the batter. Topped with optional homemade candied orange slices, this cake is not just a dessert—it’s an experience.
🥣 INGREDIENTS
Here is the table of ingredients (Yields: 12-16 Servings / Two 8-9″ pans or Three 6″ pans):
| Component (Section) | Quantity | Notes |
| 🍊 For the Orange Milk Infusion | ||
| Fresh Oranges | 2-3 | Zested (peeled strips) |
| Whole Milk | ¾ cup | Steeped with zest |
| Fresh Orange Juice | To fill | Added after steeping to reach 1 cup total |
| 🍰 For the Cake Batter | ||
| Granulated Sugar | 1 ⅔ cups | |
| All-Purpose Flour | 1 ⅔ cups | Spooned, leveled, sifted |
| Unsweetened Cocoa Powder | ¾ cup | Sifted |
| Baking Powder | 2 tsp | |
| Baking Soda | 1 tsp | |
| Sea Salt | ½ tsp | |
| Large Eggs | 2 | Room temperature |
| Oil (Avocado or Grapeseed) | ½ cup | Or vegetable oil |
| Vanilla Extract | 1 tbsp | |
| Strong Hot Coffee | 1 cup | Very hot |
| Dark Chocolate | 3 oz | Chips or chopped bar (melted in coffee) |
| ☁️ For the Whipped Cream Filling | ||
| Heavy Whipping Cream | 1 cup (232g) | Cold |
| Powdered Sugar | ⅓ cup (45g) | |
| Vanilla Extract | ½ tbsp (6g) | |
| Orange Extract | ½ tsp | Optional (or cold-steep zest overnight) |
| 🍫 Frosting & Decor | ||
| Chocolate Orange Buttercream | 1 Batch | (Ganache style) |
| Candied Orange Slices | Optional | Make ahead |
👩🍳 PREPARATION STEPS (Step-by-Step)
The steps are presented in the exact sequential order to ensure proper steeping and cooling.
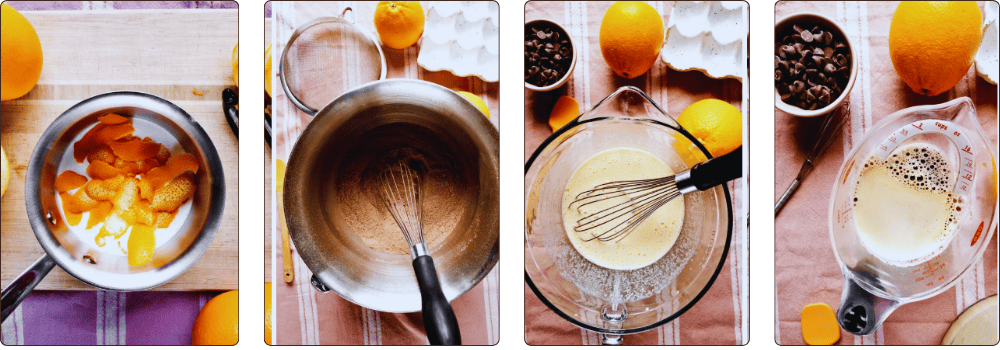
Step 1: The Orange Milk Infusion (1 Hour Ahead)
-
Peel Zest: Wash oranges well. Use a vegetable peeler to peel strips of zest from 2-3 oranges (avoid the white pith). Juice half an orange and set aside.
-
Steep: Place the milk and peeled zest in a small saucepan. Bring to a simmer over medium heat (stir constantly to avoid scalding).
-
Rest: Once simmering, remove from heat. Stir for a few minutes to prevent a skin from forming. Let sit for 1 hour to infuse.
-
Finish: Strain the milk, pressing on the zest to extract flavor/oils. Add enough fresh orange juice to the milk to equal 1 cup total liquid. Let sit for 5-10 mins (it will curdle slightly like buttermilk).
Step 2: Prep and Preheat
-
Preheat oven to 325°F (165°C).
-
Grease and flour two 8-9″ pans (or three 6″ pans). Line with parchment paper.
-
Prepare your strong coffee now so it is piping hot.
Step 3: Mix Dry Ingredients
-
Sift the sugar, flour, cocoa powder, baking powder, baking soda, and salt into a large bowl (or stand mixer bowl). Do not skip sifting!
-
Fit mixer with paddle attachment.
Step 4: Mix Wet Ingredients & Chocolate
-
Combine Wets: Vigorously whisk the eggs, oil, vanilla, and the prepared orange-milk mixture for 30 seconds.
-
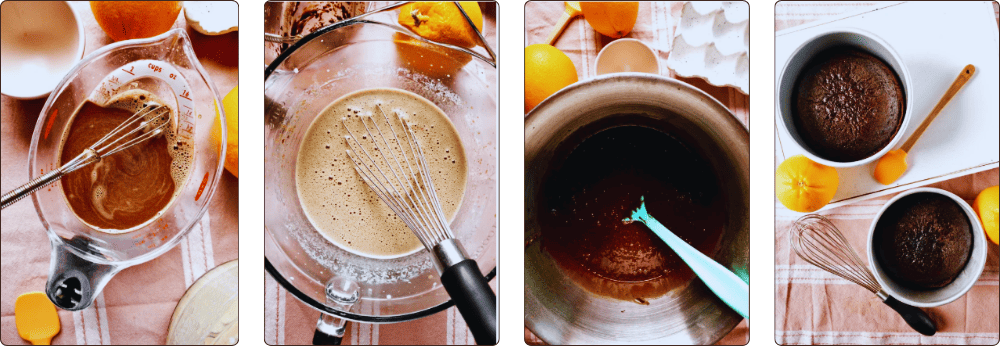
Melt Chocolate: Combine the hot coffee and dark chocolate chips. Stir vigorously until fully melted.
-
Temper: While whisking the egg mixture constantly, very slowly pour in the hot chocolate-coffee mixture.
Step 5: The Batter
-
With mixer on low, slowly add the wet ingredients to the dry.
-
Once combined, turn off mixer. Scrape the bottom and sides well.
-
Beat on medium speed for exactly 2 minutes.
Step 6: Bake
-
Divide batter evenly between pans.
-
Bake for 25-30 minutes.
-
Doneness Test: A toothpick inserted in the center should come out with moist crumbs. Check early (20 mins) to avoid over-baking.
-
Cool in pans for 10 minutes, then transfer to a wire rack to cool completely.
Step 7: The Whipped Cream Filling
-
Ensure cake layers are completely cool.
-
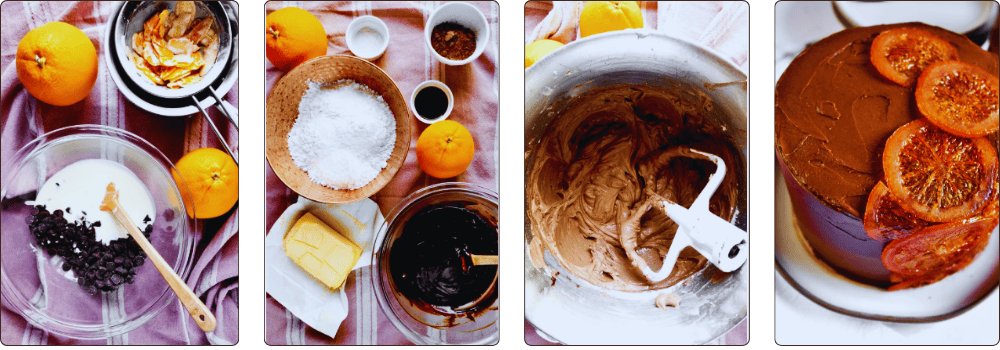
In a chilled bowl, beat the cold heavy cream, powdered sugar, and vanilla (and orange extract if using).
-
Beat until stiff peaks just form. Do not over-mix or it will turn to butter.
Step 8: Assembly
-
Slice: If using only two pans, carefully slice each cake layer in half horizontally to create 4 layers.
-
Dam: Pipe a ring of Chocolate Orange Buttercream around the edge of the first layer.
-
Fill: Spread the whipped cream inside the ring (do not go taller than the ring).
-
Stack: Repeat until all layers are stacked.
-
Frost: Apply a thin crumb coat of buttercream. Chill for 20 minutes to set.
-
Finish: Frost with remaining buttercream and top with candied orange slices.
Chef’s Guide & Conclusion
Mastering the Mocha Flavor Profile
You have just created a cake that balances the trinity of dessert flavors: Chocolate, Coffee, and Citrus. Here are the professional secrets to ensuring this recipe is a showstopper:
1. The “Steeping” Technique
The magic of this cake is in Step 1. By heating the milk with the orange zest, you extract the essential oils (limonene) which provide a floral, authentic orange flavor that extract alone cannot mimic.
-
Pro Tip: Be careful when peeling the zest. The white part underneath (the pith) is bitter. If you accidentally peel too much pith, scrape it off with a knife before adding the peel to the milk.
2. The Chocolate-Coffee Bloom
Melting the dark chocolate into the hot coffee serves two purposes. First, it blooms the coffee flavor, making it robust enough to stand up to the cocoa. Second, it ensures the chocolate is evenly distributed in liquid form, creating a sponge that is moist and tender rather than waxy.
3. Whipped Cream vs. Buttercream
Using whipped cream as a filling lightens the entire cake. However, whipped cream is not as structural as buttercream. This is why the “buttercream dam” (piping a ring around the edge) in Step 8 is crucial. It acts as a retaining wall, preventing the soft cream from squishing out the sides when you slice the cake.
4. Storage
Because this cake contains fresh whipped cream, it must be refrigerated. However, butter-based cakes taste best at room temperature.
-
Serving Strategy: Keep the cake in the fridge, but take it out 20-30 minutes before serving. This allows the buttercream to soften and the chocolate flavors to wake up, while the whipped cream filling stays safely cool.
Enjoy this sophisticated, barista-inspired dessert!


