

Soft Nougat! It’s been a long time since I wanted to test this classic confectionery recipe too, and I admit I hesitated every time. Simply because it seemed quite complicated to make. I read dozens of recipes with, of course, the reviews, and in 50% of the cases, I could read: “my nougat is runny”…
Then I said to myself: “Girl, if you don’t try, you’ll never know!” At worst, I’ll have one more failure on my list 😉.
So before you start making this authentic French nougat, read and reread the recipe. Prepare all your ingredients as I will indicate below. You will see that in the end, it is not that complicated to make.
However, you MUST RESPECT the temperatures!! This is what will give the chewy texture to the nougat.
If you exceed 155°C with the syrup, your nougat will be hard!
If you do not exceed 152°C, then your nougat will run, and that won’t be great!
I will give you a tip in the recipe to know the final texture of the nougat you are going to get…
Normally in 30 minutes, your recipe is done. Having prepared everything in advance, also know that once you start, you cannot afford to answer the phone or take a little break for whatever reason 😂 because the cooking will be underway and there is no room for error…
I found this recipe on “Meilleur du Chef”, changing a few small things but the base remains the same.
One last little thing, do not ask me what can replace the cocoa butter OR if you can omit it, because frankly, I am not qualified enough to answer you and certify that the result will be the same… If I may give you a piece of advice, wait until you have all the ingredients before starting 😉
For the equipment, you need: an adjustable frame, 2 wafer sheets (azyme paper), an offset spatula, 2 thermometers if possible, otherwise 1 is mandatory.
Ingredients:
All equipment was found on professional baking sites.
60 g egg whites
85 g glucose syrup (like for mirror glazes)
125 g mineral water
380 g + 20 g caster sugar
290 g honey (acacia for me because it is neutral)
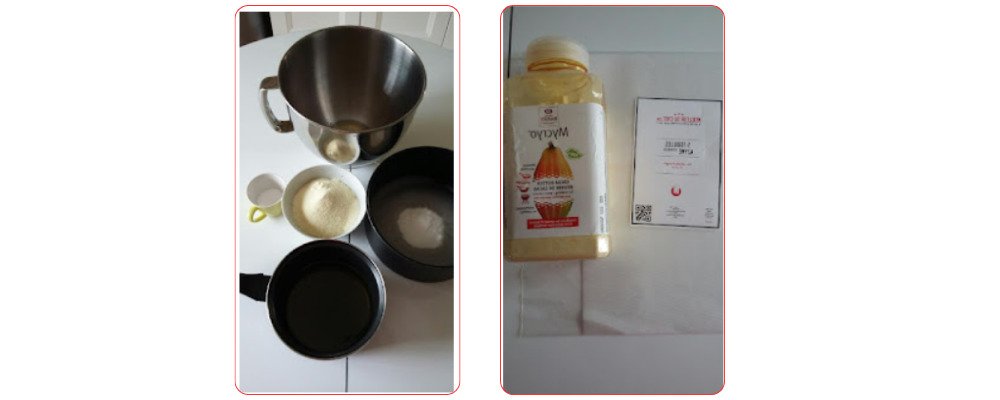
125 g cocoa butter (see photo)
2 wafer sheets (see photo)
360 g dried fruits/nuts: 200 g almonds, 100 g hazelnuts, and 60 g blanched pistachios (you can combine the dried fruits yourself… e.g., I only had 160 g of almonds left, so I topped up with hazelnuts… the final goal is to have 360 g in total!)
Instructions:
Prepare your adjustable frame with your wafer sheets. I set the frame to 19 cm / 28 cm.
Grease your frame using a grease spray or a brush. Get a flat surface (tray or baking sheet).
Place your wafer sheet with the smooth side facing you; the ribbed side should be towards the tray, and place your frame on top.
Cut the second sheet which will eventually be placed on the nougat and set it aside.

Now prepare your ingredients:
The egg whites in the mixer bowl, the honey in a saucepan (careful not too small like mine, because honey boils up, it risks overflowing the saucepan).
In another saucepan, the water, sugar (380 g), and glucose.
The 20 g of sugar which will be used to stabilize the whites in a cup, and the cocoa butter in a large bowl. (See photo for the wafer sheets and cocoa butter).
Preheat your oven to 150°C (300°F).
Distribute your dried fruits/nuts on a baking sheet covered with baking paper, taking care to spread them out well.
Place in a hot oven for 15 minutes. Set a timer so you don’t forget them.
After 15 minutes, turn off the heat and leave your nuts in the oven because they must be warm when they are incorporated into the nougat… Especially not cold!! So don’t do it too far in advance.

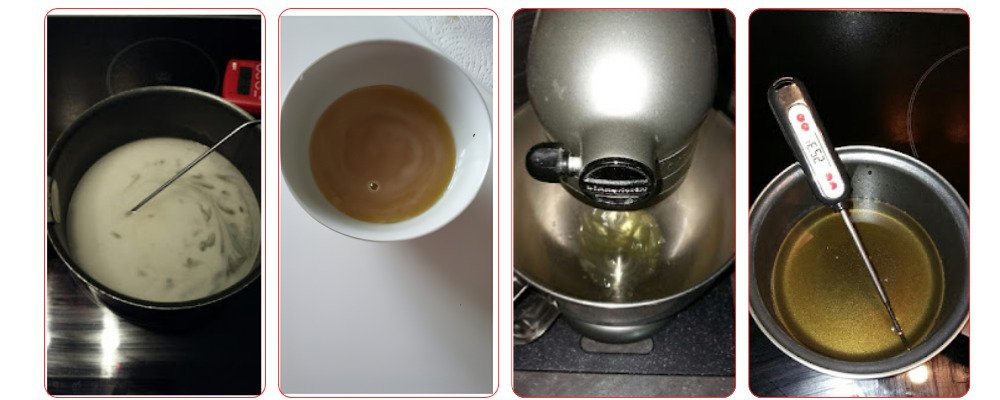
Start by heating the syrup (water + glucose + sugar) over medium heat. (This takes the longest to heat up).
Melt the cocoa butter in the microwave and set aside. CAUTION it must be lukewarm too for incorporation.
Start whipping your egg whites gently.
Heat the honey too, which, on the other hand, rises in temperature very quickly.
REMINDER: Alert alert!! We haven’t forgotten our nuts in the oven, right? 😉
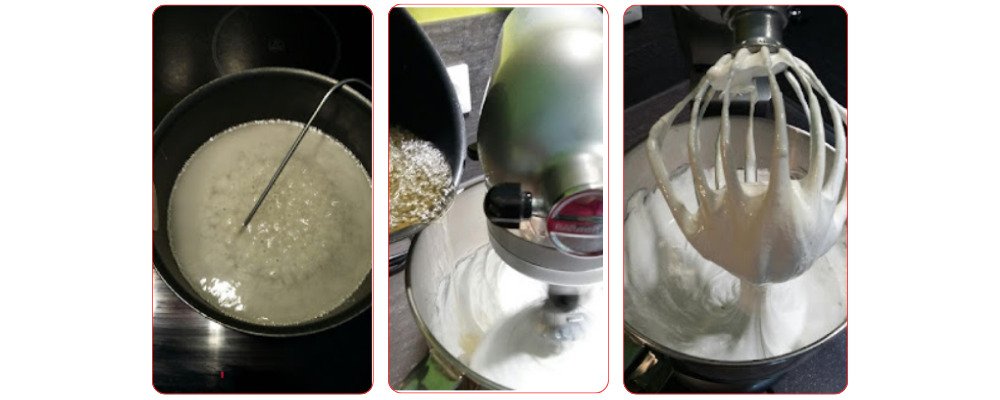
Increase the speed of the whites and as soon as they start to be firm, incorporate the 20 g of caster sugar in 3 times to stiffen them like for a meringue.

Also increase the heat for the syrup and honey to full power.
Let your mixer run, do not stop it.
When the honey is at 121°C, lower the speed of the mixer and pour in a thin stream down the side of the bowl onto your whites. When all the honey is incorporated, increase the speed again.

Wait for your syrup to reach between 152°C and 155°C this time. So if I understood correctly everything I read in my research, if you do not respect these temperatures you will not have the desired nougat! Below 152°C you will have a runny nougat and above 155°C you will have a hard nougat!!
So what I did, when I reached 152°C / 153°C, I turned off the heat because you will see that it continues to boil… Pour over your whites, having taken care to reduce the mixer speed because watch out for splashes!!!
Once the syrup is incorporated, increase the speed again and let run for 2 minutes, no more!
You get a very smooth and ultra-shiny meringue.
In the photo below, in the saucepan, the syrup is around 100°C but you can see that when I pour it over the whites, it no longer has the same color…
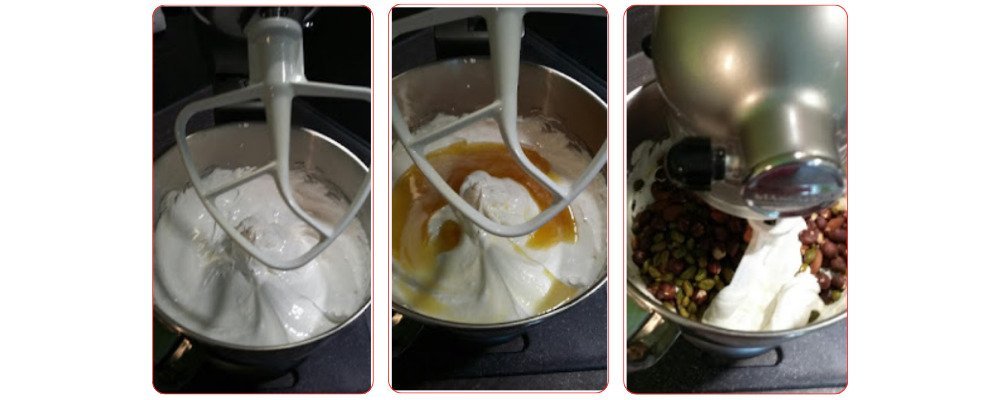
At this stage, stop the mixer and hurry to change the whisk attachment to the paddle attachment.
Pour in the warm cocoa butter and mix for barely 1 minute and then add the dried fruits/nuts.
Mix until the butter is well incorporated (it goes fast).
Tip: to check the texture of the nougat, take a piece of paste with a spoon or the tip of a knife and run it under very cold water. You will be able to realize immediately if it suits you… For me, it was OK; if, on the other hand, you find it too soft, get a hair dryer and heat the bowl for 2 minutes to dry it out… But if you respected the temperatures well, this step will be useless!
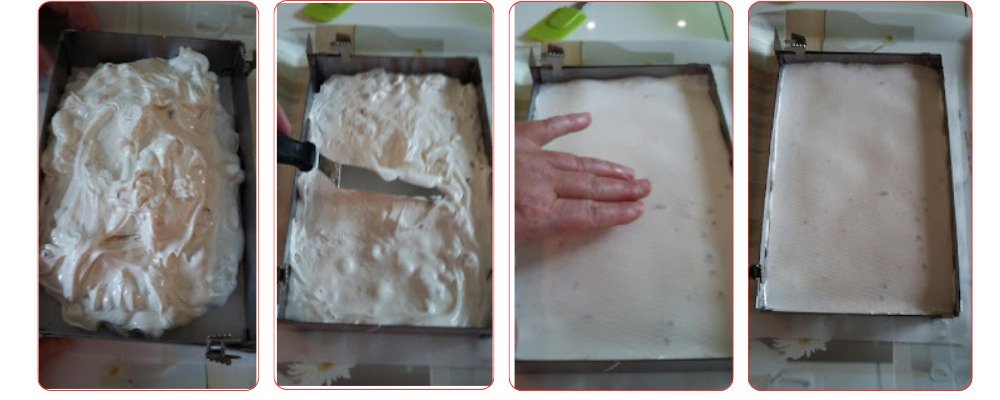
Pour your nougat without delay into your frame.
Spread it using an offset spatula to have a very smooth and leveled surface.
Finally, place your second wafer sheet and press down.
Leave your nougat overnight without touching it at room temperature.
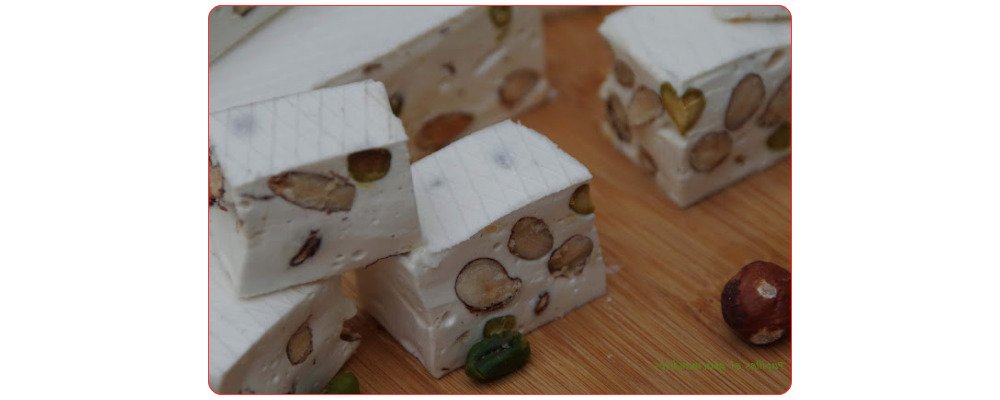
The next day, remove the frame and cut strips of 2.5 cm or 3 cm or even cubes.
Use a large, sharp knife; dip the blade in hot water, wipe it well, and cut.
For storage, some people advise against the refrigerator and others don’t.
So what I did, since it’s hot right now, I find it a bit sticky and soft, so I wrapped the nougat strips in cling film, put them in an airtight box, and 30 minutes before eating them, I put them
the refrigerator… Not more because afterwards, it will harden too much… it’s up to you to test what you prefer.
In any case, this nougat keeps for three months.
So you see, if you are well organized, you can also make homemade nougat…
Nothing complicated in the end!

Enjoy Your Homemade Sweet Treats!
This traditional nougat recipe proves that making confectionery at home is achievable with precision and patience. The combination of crunchy roasted nuts and soft, honey-sweetened meringue creates a gourmet candy perfect for gifts or holiday treats. Happy tasting
In any case, this nougat keeps for three months. So you see, if you are well organized, you can also make homemade nougat… Nothing complicated in the end!
To ensure your honey-nut confection remains perfect, remember that humidity control is key. Moisture is the enemy of nougat, making it sticky. Always store your gourmet candy in an airtight container, using parchment paper between layers to prevent sticking.
This recipe produces a high-quality Montélimar-style nougat that makes for stunning edible gifts during the holidays or special occasions. The combination of roasted almonds, hazelnuts, and pistachios provides a satisfying crunch against the soft, aerated meringue. By strictly following the temperature guide and using a candy thermometer, you guarantee a chewy texture that rivals the best French patisseries. Happy baking and enjoy your sweet success
")
")

